Showing posts with label Craft. Show all posts

Monday, February 24, 2014

Entering K&Q Arts & Sciences

First the negative. I'm generally not a fan of A&S competitions as I feel that they're far to subjective to the whims of those judging. I also dislike that most entries are focused on dramatic finished pieces, I feel that the craft gets overlooked because they're so mundane. That said, I was talked into entering this K&Q on the premise that a number of us band together to concentrate on the craft components of our individual disciplines rather than the end product. That appealed to me.

The intention had been to display more, but mundane reality took over so that my entry was reduced down to just two pigments, sap green and verdigris. Both were considered important greens to the medieval artist.


My Experience.
I went into this with eyes wide open. It was about display with the aim of discussion rather than competing to win anything. I feel like this was an important distinction for me and helped relieve some of the feeling of obligation that I often get around this type of thing. My entry was based around what I wanted to show and how I wanted to show it, it wasn't complete and I willingly displayed my mistakes and failures, even pointing a few of them out. Documentation was written in a style that suited me and my thought process rather than trying to fit it into a set of arbitrary rules about how long it should be or how it should be formatted. Basically, I did this MY way.

Judge #1: This was a positive but interesting experience. The judge read my single-page synopsis and then semi-speed read my full documentation. I appreciated this as I feel like just as much work goes into writing documentation as the research. We then discussed my entry at some length, talking about what I had on display and how I could (and intend to) push it further. The thing that struck me the most about this experience was the open negotiation over scores, I've never seen this before. It's an interesting approach that I think I might adopt for myself if I find myself being a judge again in the future. I am my own worst critic and I already knew this, but it was interesting to hear someone else's take on my own thoughts in live-time. The only thing I think that I would change about this style of judging would be to later add a comment or two on the score-sheet.

Judge #2: Again, a positive experience and I appreciated my documentation being read in full, with some injected discussion. The comment on the score sheet from this judge was very uplifting and recognized one of my ultimate goals, so it was a little of an ego-boost for me and suggests that I'm heading down the right path for my personal journey.

Judge #3: This judge challenged me but it wasn't in any way negative, questions were asked that made me think. I did feel quite flustered and tongue-tied while talking with this judge as I just couldn't seem to find my words. I should have been able to answer at least one of the questions asked because I know for a fact that I've read the answer during my research. It's a really basic question too. The other question that stuck out was something I know to be true but I don't know WHY I know it's true. Yet. This one will send me down a research path and there will probably be an associated blog-post at some point. I thought this judge would end up being the harshest of my scoring, surprisingly they weren't (not that any of my scores were bad). This judge don't read my documentation, but they did take a copy away with them.


Tuesday, December 17, 2013

Rendering Suet

Purchased beef suet.
Suet is raw beef fat [1] and is generally considered a waste product of the commercial meat industry. In hindsight I would have preferred to use pasture-fed, organic suet so that I can use it for creams and soaps, however since the original plan was to just use it for candles I'm starting with two packages of beef suet purchased from the local supermarket - 2.90lb for $1.69/lb. Next time I will be a more discerning shopper.

First, chop the suet into small chunks, the smaller the chunks the easier it will process (if you have a meat grinder available then use it). Raw suet feels greasy to the touch just like you imagine fat to feel. Discard anything that looks like muscle, tendon, bone etc.

Almost 3lbs of chopped beef suet.


Simmering on the stove.
Liquid after filtering.
 Put the suet chunks in a large pot and just enough water to cover it. Bring it to a boil CAREFULLY, making sure that it doesn't boil over as it will smoke, set off the fire alarm and potentially cause a fire [2]. If it does overflow it's disgusting, clean up any mess immediately.

As soon as it starts to boil turn the heat down to a low simmer. I left mine like this for about three hours mashing the solids every so often to release the fat [3].

When you decide that it's finished cooking, carefully pour the fatty water through a sieve into a clean bowl and squish the juices out of the fat solids (in the sieve) as best you can. You'll be amazed at how much liquid these retain. Let the bowl of "juice" cool until the top is a solid, creamy-white mass. I put mine in the fridge overnight.

Tallow after being
chopped for final cooking.
Use a knife around the outside to separate the mass of fat from the sides of the bowl, but be careful not to slop the liquid underneath. Lift it out and rinse it in cold water to get the scummys off, I used a knife to gently scrape them away. I weighed mine and it came in at 2.11lbs (down from starting at 2.90lbs. At this point some say to do a second simmering, however I chose to follow instructions that just went straight to chopping it up and putting it into a double-boiler set-up. Melt it down and let it boil off any remaining water. Mine sat on the stove for about two hours.

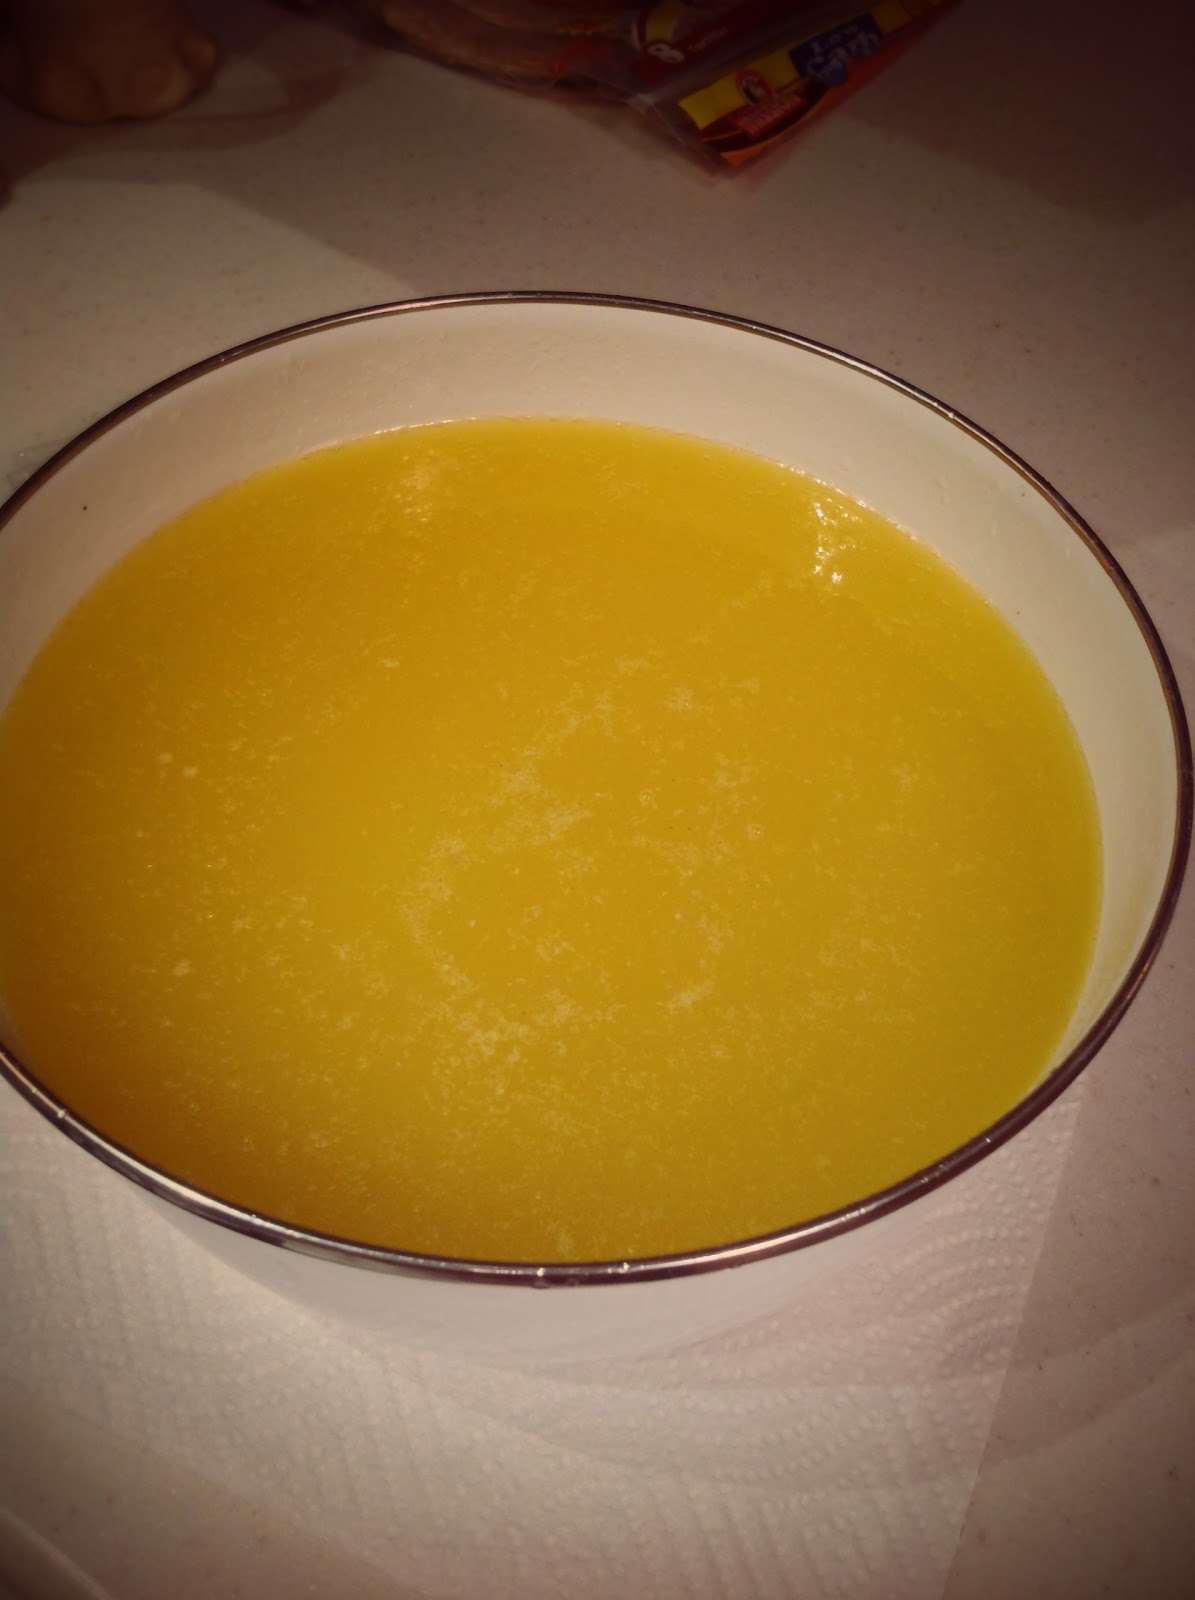
Strain it through a fine sieve to remove any remaining scummies. I used a piece of natural linen in my metal sieve. At this point you can strain it straight into your final storage container, it will harden to a creamy-white mass. Mine has the slightest hint of a beef smell when you stick your nose right up to it.
Finished tallow that will be used to make candles for the production of lamp-black pigment.


Citations:
[1] Mirriam-Webster Online defines suet as "the hard fat about the kidneys and loins in beef and mutton that yields tallow".
[2] My "Shop Gnome" and I were having a discussion when he convinced me (stupidly) to continue it in the garage since the pot was nowhere near boiling. Not three minutes later I hear the sizzle of the fatty water hitting the stove-top and open the door to discover smoke billowing from the kitchen just as the fire alarm started to warn us of the danger. It was a HUGE disgusting mess of fat covering everything and took a decent amount of time to clean up before I could put the pot back on the stove.
[3] I've since read accounts of others leaving it to simmer for up to eight hours. Some using the stove, others using the low-setting on the crockpot.

Sources:
http://thehoodedhare.com/lighting-in-the-middle-ages.pdf

http://www.candles.org/about_history.html

http://en.wikipedia.org/wiki/History_of_candle_making

http://lostartskitchen.wordpress.com/2011/03/12/rendering-fats-at-home-primer-lesson-one/

http://preparednessadvice.com/food_storage/suet-and-tallow/#.Uqz1HSG9KK0

Wednesday, December 11, 2013

Discussing the Use of Mortar & Pestles

This is a post that I started on Google+ and is embedded here since I consider it a significant discussion on a common tool used by many trades that is probably never given much thought. Please join the discussion in the comments section below.

Monday, December 9, 2013

Guild Mirandola's Oak Gall Ink Kit

Or, Isabel and Aife have a playdate.

At one of the recent SCA events I attended there was an auction and one of the items was a bag full of scribal goodies. Of course I had to have that baggie, but if truth be told I feel a little guilty for paying so little for goods worth A LOT more. One of the items in the baggie was an Oak Gall Ink Kit from Guild Mirandola, a small scribal supplies vendor here in the East Kingdom.

Aife needed ink for something she's working on, and I just happened to have the supplies available. What follows isn't my own work, it's what happened when we followed the instructions included in the Kit. I'm not going to specifically detail the instructions and ingredients here as I feel that would be unfair to Guild Mirandola (Doscelina's contact information can be found on the website). The Kit contains very easy to follow instructions and I strongly recommend that people buy the Kit. This is period-style ink making made so simple that ANYONE can do it.


Although the Oak Gall Ink Kit contains exactly the about of ingredients you need, we actually ended up making double what was specified because I had my own supplies already but had never actually gotten around to using them. Other items needed are easy to lay your hands on and should be readily available to most people.

Crushed gall nuts in the mortar.
First order of business was to set up the gum arabic crystals to dissolve while we followed the rest of the instructions. Once that was set up we needed to crush the gall nuts. They were shoved into a plastic ziplock bag, that was then wrapped in a kitchen towel and then smashed vigorously with a hammer borrowed from my "shop gnome". Once they'd been reduce to much smaller pieces they were transferred to the mortar and pestle and ground into "a fine powder".

I do want to comment on how annoying these were to grind, they proved to be much tougher than I had imagined. They are surprisingly hard and I actually ended up with a blister in the center of my hand from the grinding. Get around this by getting them as broken and small as you possibly can with the hammer. The smaller they are before they hit the mortar and pestle, the less hand grinding you'll need to do.

You'll end up with this...

Gall nuts reduced to "fine powder"
Continuing to following the instructions, add the water and let it sit. So just how patient are you? We were working on a couple of other projects at the same time, so our little container of brown gunk actually ended up marinating for well over an hour. It has a VERY earthy smell which I surprisingly found quite pleasant.

Back to following the instructions that came with the kit and we find that it's time to add the green ferrous sulfate. The instructions say that when you add this to the brown gunk it will start to turn black immediately, and it did! We both stood there, staring into the jug saying "that's SO COOL!". We then stirred vigorously so that everything was thoroughly mixed.

Oak gall "tea" after the ferrous sulfate has been added.
Next step was to filter the mixture through some linen to remove all the nasty gunky bits. We used a piece of natural coloured linen which we first saturated with water to help the process along.

Oak gall ink mixture being filtered through linen to remove the debris.
We ended up with about a half of a pint-sized Mason jar of black liquid, basically a dye, and to this was added the gum arabic which we had been dissolving. The addition of the gum arabic provides the binder (glue) that turns the dye into an ink, making it stick to a page.

Upon testing, we found that we had achieved a nice writable ink in a viscosity that I liked. I will admit to being a little surprised at how black it was straight out of the jar, I was expecting it to initially write quite faint (it darkens over time) and be almost translucent but it wasn't.

Very rough draft writing with the ink made from the Guild Mirandola Oak Gall Ink Kit.


A word on dissolving the gun arabic crystals. We found that keeping the solution warm helped the crystals dissolve at a much better rate. We had allowed the water to cool while we worked on other things, it really delayed the process and the crystals stuck to our stir-stick.

For detailed instructions and supplies please purchase one of these
Oak Gall Ink Kits from Guild Mirandola

Thursday, December 5, 2013

How to Care for Your Metal Dip Pen Nibs

Most modern calligraphy nibs are made of metal, and like most things they need a little tender loving care to keep them in good condition. Inks not only have the potential to clog your nibs as they dry, but some inks are actually corrosive and damage them.

Disclaimer: This is MY way of doing things and works FOR ME, others may do things differently. There is not "one true way", so find what works for you.

Cleaning:
There are commercial nib cleaning solutions available for purchase, however I've never used one as I don't really see the point. I consider my nibs disposable items and I fully expect them to deteriorate over time, needing to be replaced. That's not to say that I don't try to keep them in good condition, so here are my tips for cleaning metal nibs.

After use I either swish my nib in the rinse-water jar I've been using or use a pipette to squirt water over the nib, but I'm not overly concerned with getting all the ink off the nib. Afterwards I take the nib out of the pen holder so that it can be fully cleaned and dried. My next step is to take a Q-tip and dip one of the ends into rubbing alcohol (both can be purchased in any pharmacy or supermarket), then I use that wet end to thoroughly clean the nib surface. Using a Q-tip allows you to get into all the nooks and crannies on the nib, and the beauty of rubbing alcohol is that it dries VERY quickly through evaporation, leaving the nib mostly dry and reducing the potential to rust. Dried on ink will need more pressure than "fresh" ink, but be careful not to bend the nib ends.Once I've gotten off as much of the ink as I can I just let the nib and pen holder sit on some paper towel for a while so that they can dry further before I store them away.

Some nibs have attached reservoirs on them, especially if you're using the Speedball brand nibs that come in the variety packs at the local art/craft stores. These can be a little annoying when trying to clean your nibs as the reservoir creates a space where ink can get trapped, allowing it to dry and gunk up the nib. Personally I've found these reservoirs more trouble than they are worth as I find that not only are they difficult to clean but, for me, they also load to much ink on to the pen when writing. I've ripped the reservoirs off when ever they've been attached to a nib that I use. This is where the pipette comes in handy, use it to flush the rubbing alcohol under the reservoir. Another option is to try to side some paper towel between the nib and reservoir, be careful as you do this though as you don't want to pull the reservoir to far off the surface of the nib.

Nib Tune-Up:
You will need a whetstone, I bought mine from John Neal Booksellers - Hard Arkansas Stone.

My first step is to put a drop or two of water on the end of the whetstone and just rub it into the stone a little, I'm not 100% sure if it's actually needed but all the things I've seen and read tell you to moisten the stone with either oil[1] or water.

Step 1: Sharpen the very tip of the nib.
Step 1: Next place the very tip of the nib on the whetstone so that it perpendicular to the stone. You are now going to stroke the nib back and forth (sideways) a few times on the whetstone to achieve a straight tip. It's VERY IMPORTANT that you make this motion from your shoulder and NOT your wrist. Moving from the wrist will twist the movement and has the potential to round the edges of the nib, by moving from the shoulder this is less likely to happen.

Step 2: Smooth the edges of the nib of any burrs.
Step 2: I will then turn the nib so that the side of the nib is resting on the edge of the whetstone. Again, moving from the shoulder, stroke back and forth a few times to remove any burrs. Repeat this for the second edge.

Step 3: Smooth the back of the nib at a very slight angle.
Step 3: At this point I I lay the back of the nib against the edge of the whetstone and then angle it up a little, using the same back and forth motion to remove any burrs from the back.

Step 4: Sharpen the front of the nib.
Step 4: The last step with the whetstone sees me working the front of the nib. Lay the nib on the stone and then angle it up to about a 30% angle, use the back and forth motion a few times.

If you look closely (use a magnifier if you like) you will see bright clean metal around the areas the nib has brushed against the whetstone.

My very last step is to run the edges over the leather whetstone sleeve to soften them off a little.

It's important to remember that although you're "sharpening" you nib, you don't want it so sharp that it actually cuts the surface (paper, parchment, etc.) you'll be writing on. Once you've tuned-up your nib try writing with it, if it's catching on the surface you can dull the very tip a little by going back and repeating step one with a couple of strokes.

My habit is to tune-up my nib at the beginning of my scribal session. On occasion, if the piece I am writing is really long, I will need to pause part way through to give another quick tune-up. Once you've done this a time or two, you'll get a feel for how much or how little you need to tune-up your nibs. It's not difficult to do and it will not only prolong the life of your nibs a little but also help the nib move a little easier across the page.


Footnotes:
[1] Don't use oil on the stone your using with your nibs as you don't want that transferring to your finished page.

Sources & Bibliography:
Class taught by Eva Woderose at Known World Herald & Scribes Symposium in CT, 2012.

Other various sources of which I don't remember.

BROWN, Michelle P. & Patricia Lovett. The Historical Source Book for Scribes. London: The British Library, 1999. Print. ISBN 0-8020-4720-3

Friday, November 22, 2013

Sap Green (Part 2)

In Part 1 I described the discovery of Buckthorn growing in my small upstate New York garden, it's identification and subsequent production of berries. On September 4, 2013 I picked and sorted these berries into what you see below.

Buckthorn berries in three stages of ripeness; 28g of unripe green; 30g of medium-ripe blush; and 117g of ripe purple-black.
The period art manuals offer a variety of methods for creating the colour we know as sap-green, which all seem to be variations on squeezing the juice of the berries through a cloth, adding alum, sometimes ley and then storing it. This post will concentrate on the methods that DON'T use ley.

PADUAN MANUSCRIPT - Merrifield, 662
31. How pasta verde [sap green] is made. - Take the grains or berries of the buckthorn when they are quite ripe, and this will be about the end of September; let them soften for 7 or 8 days in a vase with water in which roche alum has been dissolved in the proportion of 1 ounce of alum to 6 of the berries, and boil it well until nearly half the water is consumed; then cool it, strain it through a linen cloth, put the part that is strained into pigs' bladders, and dry them in the sun or smoke; and this is called "pasta di vesicha."

Prep: Six individual ripe berries doesn't even register weight in grams ounces, therefore I am going to make the obvious leap that the above recipe means 1oz of alum to 6oz of berries. I do not have enough berries for that measurement therefore I am going to use 1oz (28.3g) of berries and divide that by six for the correct amount of alum, which is 4.67g.

The recipe doesn't specify an amount of water so I poured in an amount equal to approximately 2 inches in depth (yes, I should have measured), this will cover the berries by the same depth that they take up. Using a double-boiler setup I warmed the distilled water and alum in the glass jar just enough so that the alum completely dissolved, then removed it from the heat and allowed it to cool. This alum water gives me a ph3 (leaning towards ph4).

No mention is made about crushing or pounding the berries so I didn't. When pouring the berries into the water it immediately took on a green hue and it will be interesting to see how this deepens (if it does) over the course of the next week. All of the berries except a few are hanging out on the bottom of the jar, only a few are floating around on the top of the liquid or just under it's surface.

This was repeated with the green unripe berries, and then the semi-ripe blush berries using the methods described above. This time I measured and used 2oz of water to dissolve the alum in each jar. The unripe berries seem to float on the surface of the solution. The semi-ripe berries don't float like the green ones do, but they also aren't sat on the bottom of the jar like the fully ripe berries. On initial observation all three jars seem to be leeching the same green colour.

Result: A week later the individual jars are showing a strong dark colour, which upon close examination looks green to the eye but from a distance looks quite muddy. There is an obvious sediment in the bottom of each jar, but the berries appear plump and not to have started breaking down.

Opening the jars I noticed that they each seem to have vacuum-sealed themselves, but only a little. Once the lid was off, each jar gave me a slight smell of fermentation with the jar of ripe berries presenting more of a smell than the other two (I wonder if some sort of vinegar or wine can be made from Buckthorn berries?).

For the boiling portion of this recipe I again used a double-boiler setup. I didn't really achieve what I would call a rolling boil, but I did notice evaporation of some of the liquid. I have to admit that I got nervous during this portion of the recipe as I was worried about ruining what I do have. I may attempt the boiling portion again at another time.

For straining, I used a piece of natural linen placed in a small metal kitchen sieve which in turn was placed over a glass bowl. Taking the jar containing the ripe berries, I slowly poured the juice out over the linen so that it strained into the bowl beneath.

I then poured the berries that remained in the jar out onto the linen, gathered up the corners and crushed the sack in my fist to drain out any remaining juice. The berry refuse was then deposited in the rubbish bin. This is when I started to notice just how much sediment there actually was in the jar. The linen cloth was covered in it.

Next, I rinsed off my utensils and linen as I made a mental notation of just how much colour was rinsing out of them. Stupidly I didn't think about "clothlets"[1] until after I had drained the third jar. This is a subject I will need to look into for when I do this again.

One more note-to-self; wear gloves next time as the juice of Buckthorn berries stains your hands a wonderful green hue which is difficult to wash off. This is particularly evident in the absolutely stunning green that was achieved on the linen used to strained the juice from my jars.

The piece of linen used for straining the liquid from the jars, AFTER being rinsed and dried, sitting on it's original fabric.
I now have three jars of filtered juice from the ripe, semi-ripe and unripe berried of the Buckthorn. As you can see in the photograph below, they are two very distinct colours with a subtle difference between the jars containing the liquid produced from the unripe and semi-ripe berries. The next phase (and blog-post) will explore what these colours look like when painted as swatches.

The three differing colours obtained from (left to right) ripe, semi-ripe and unripe Buckthorn berries.
BOLOGNESE MANUSCRIPT - Merrifield, 420
89. To make a good green with buckthorn. - Take small berries of buckthorn when quite ripe, put them into a glass vase, and crush them well with your hands; then place them in the sun, and let them remain until the juice rises above the berries; then strain the refuse, and throw it away, and if the juice weighs one pound put into it the weight of two quattrini [2] of roche alum in powder. Place the mixture in the sun in a well-closed glass vase, and let it stand three or four days, stirring it well three or four times every day; and if it should happen to dry after a time, distemper it with clear ley, with a little gum.

Prep and Results: I found this recipe to be a little strange. Crushing the berries as described in the first sentence produced hardly any juice. What little juice there was then evaporated over the course of the following couple of days.

As a variation, I tried this same recipe and added a little distilled water to assist in making a juice. This worked slightly better but produced no where near "one pound" of juice. As a result, I didn't really get a chance to properly follow through with this recipe.

The juice didn't really "rise above the berries" and I'm curious to know if this is just a result of the batch-size I was using. The recipe does mention "one pound" of juice which leads me to believe that they were processing HUGE batches at a time.

Nevertheless, I squeezed out what I could into a clean glass jar and quickly realized that continuing to follow this recipe with what I had was pointless.

I poured what little juice I had out into an oyster shell, it is almost the colour of red wine. Adding alum to the juice made it turn an olive purple, so I added more until what I had in my shell was a definitely green liquid. Whats funny is that even though I see a definite green hue with my eyes, all the camera see's are red hues.

Juice of the ripe Buckthorn berries in an oyster shell with added alum. Although the photograph displays the liquid
as the colour similar to red wine, to the human eye it is actually green.
From Thompson, 170
To prepare the green, the juice of the ripe buckthorn berries was squeezed out, mixed with a little alum, and allowed to thicken by evaporation. The result was a gummy green colour, generally rather olive, transparent, and rich. The use of buckthorn berries was used quite early, without preparation, to temper and enrich verdigris; and probably it's use as an independent pigment came about as a development of its accessory function. Used by itself, without alum, the juice is somewhat yellow or green, according to the ripeness of the berries, but it's colour is very fugitive. . .The colour made with alum is more durable, though not permanent . . . 

Prep: 20g of the ripe purple berries we deposited in a 6oz mason jar and crushed,  I then covered them with purchased distilled water of ph8 to the 2oz line. The reason I added a little water is so that I can soak out the juice (and hopefully more colour) from the berries, as when crushing the berries they didn't seem to produce much liquid. I do plan on letting this verjuice sit for a week before straining it as many of the other recipes suggest. Looks like the basic verjuice is ph5. It has a very muddy colour which could be called olive brown, with a hint of green.

Results: After a week in a sealed mason jar the berries look and smell like they've fermented. I used a piece of natural linen to strain the mixture and squeeze the berries of liquid, my result is a liquid almost the same  colour as red wine. Strangely, the linen cloth has a slight green tint to it.

I added a generous amount of alum to the purple-juice and it immediately turned into a dark green. I didn't really measure but it was six scoops with the plastic spatula. I basically added alum until I had a Rich green colour. After a number of days had passed the juice had returned to a muddy brown colour, suggesting that something other than alum affects the colour. [3]

Conclusion:
These recipes seem like overkill. I feel like all I really need to do to obtain the colour is to squeeze the berries through linen into a shell and add a little alum. I will be curious to see how these different methods paint up when used in swatches. There is also the use of lye in some of the recipes which needs to still be explored.

Footnotes:
[1] From the British Library's Catalogue of Iluminated Manuscripts glossary: "A piece of cloth impregnated with PIGMENT (generally a vegetable dye). A portion of such cloth, when soaked in a little BINDING MEDIUM, releases its colorant and produces an artist's pigment. Clothlets are called petiae in Latin and pezze or pezzette in Italian; bisetus folii refers to clothlets dyed with folium, or turnsole, extract. Clothlets were a convenient way of carrying or shipping vegetal pigments, and they were especially popular from the fourteenth century on, with the growth of the textile trade. Glazes of vegetable dyes were often used to enhance other colours in book ILLUMINATION, since they created a rich, glowing, and transparent effect."

[2] Since I had intended to follow this recipe I needed to figure out what a "quattrini" was and how much it weighed. Merrifields footnotes on page 420 tells us "Quattrini. Small copper con, worth about the fifth part of a crazia, or the 60th part of a Florentine lira; perhaps so called because a quattrino was of the value of four denari or piccioli, now no longer in use." With a little searching, I discovered a 15 c. quattrino from Bologna that was listed as weighing 0.39 grams (and of course now I can't find the screenshot I saved for reference).

[3] Later discussion with Master RanthulfR of the Midrealm regarding the colour of the liquid suggests that the calcium carbonate in the shell reacts with the liquid to turn and keep it green. Further observations are needed by myself, but this information corresponds with what I'm currently seeing in my own tests.

Bibliography:
MERRIFIELD, Mary P. Medieval and Renaissance Treatises on the Arts of Painting. Mineola: Dover Publications, Inc., 1999. Print. ISBN 0-486-40440-4

THOMPSON, Daniel V. The Materials and Techniques of Medieval Painting. Mineola: Dover Publications, Inc., 1956. Print. ISBN 0-486-20327-1

Wednesday, October 16, 2013

The Making of a Gold Pigment for the Black Hours Scroll

Recently I created a Peerage piece based on the Sforza Black Hours, which required the use of a lot of gold. When inspecting the original I came to the conclusion that the gold (and silver) were most likely applied with a brush or quill, as opposed to having been gilded.

I needed powdered gold to use as paint, and I needed a lot of it. This is how I made it.

A number of the period manuals describe the making of powdered (sometimes called pan or shell) gold by grinding it in a mortar with salt and honey, somewhat surprisingly I decided not to use that method for my own uses. I'm not entirely certain why. Instead I went with a method that I have read about on various websites pertaining to Orthodox iconography painting.

Most of the time I use gum arabic in dry powder form, just adding a little to my dry pigment as I begin the grinding process. For this method of making pan gold I needed a liquid, so my first step was to make a high-ratio gum Arabic solution.

A quick search of the internet bought me to the following instructions:

"To prepare the gum arabic-water solution you will need approximately one part of water to an equal amount in volume of gum arabic. The actual proportions here is not critical, but what is vital is that the consistency of the gum-water solution should be like thick honey. In a double boiler, heat the water and stir in the gum arabic. Powdered gum takes less time to dissolve then lumps, but complete dissolution still requires about two to three days. After the solution cools, cover and leave it until the solution is clear and the gum completely dissolved. Strain the gum solution through cheesecloth into a clean jar. Keep refrigerated when not in use for it spoils easily. Never heat this solution over a direct flame or heating element, for it will scorch."

Unfortunately I didn't make a note of the source (if anyone knows the source please let me know so that I can give due credit), but following these instructions I set about making my own.

Supplies for making a high-ratio
gum arabic solution.
Firstly, gather supplies - distilled water, gum arabic powder, a measuring cup, a saucepan, a cup (or bowl if you prefer), and a stirring device.

Fill the saucepan with regular tap water and place into this the cup/bowl, essentially creating a double-boiler. Measure out a quantity of the distilled water, in this case I measured out a 1/2-cup, and pour it into the cup/bowl. Turn on the stove and bring the water in the saucepan to a boil, which will in turn gently heat the water in the cup/bowl.

Dissolving powdered gum arabic
using a double-boiler method.
While this is happening, measure out the same quantity of gum arabic powder (1/2-cup). Once the distilled water is warm, start adding the powder one spoon at a time and mix well to dissolve. Eventually the top will get frothy and it will thicken to the consistency of honey.

Once you're happy with the consistency, pull the cup/bowl from the saucepan, cover (I used a small plastic sandwich bag) and set aside to cool down. At this point it looks very creamy-white. Once it's completely cool, place it in the fridge.

After a couple of days the powder will have dissolved further and have turned a clearer amber colour, like honey. Mine still has what looks like froth on the surface, I'm assuming that this might be undissolved powder but I'm not completely sure.

Straining gum arabicsolution through
a cloth to remove any parti
The next thing you want to do will be to strain it through a cloth to prevent any particulates being in your finished solution. I cut up a pair of stockings (art before beauty!) to use as a filter for this and let the solution drain into a Mason jar.

Grinding the Gold into Pigment
Before you begin, find a comfortable spot to sit with a solid surface in front of you. Next cue up a movie to watch to keep you occupied while you do this because it is BORING...

You will need a shallow dish of some sort. I have a set of porcelain dishes I got from an art supply store, in reality you could just use a saucer from the cupboard (ProTip: Goodwill is a fantastic place to shop for such things).

First, add a glob of the gum arabic solution to the clean dish, about the size of a US Quarter (25c). Onto this place a leaf of gold, the same as you would use for gilding (in my case 23k gold from John Neal Bookseller). With the pad of your index or middle finger tap down on the gold a few times until it disintegrates into the gum solution. Add another sheet of gold leaf and repeat the above process until you've used about 10 sheets. You may find that you have to add a little more gum arabic solution if things get to dry.

You should have something that looks a little like the picture to the left. Now, add a couple of drops of distilled water to moisten it a little. You're now going to sit there for an hour or so, grinding the gold solution with your finger-pad.


The dish of gold will start to look like this. Continue rubbing (grinding) the gold particles to make them as small as possible. Once you feel that you been grinding for long enough, do it some more.


Finally, add enough distilled water to your dish so that it covers the gold and creates a small lake. Swirl the water around just a little, "washing" the gold, not to much though as you don't want to remove to much of the gum arabic, then let it sit. Preferably covered, and preferably overnight. By doing this you're allowing the gold particles to completely settle on the bottom of the dish since they are heavier than the water. The water will appear clear. Use an eyedropper (available from a local pharmacy) to carefully remove as much of the water as you can, you won't get all of it. Let the remaining water evaporate.

Congratulations, you now have a gold paint that you can use with a brush, pen or quill. Reconstitute with a little water and use in a similar manner to gouache or watercolour. I found that it has a fairly "gritty" consistency and I'm currently unsure if this is what you get since it's a metal or if I just didn't grind the particles small enough during preparation.

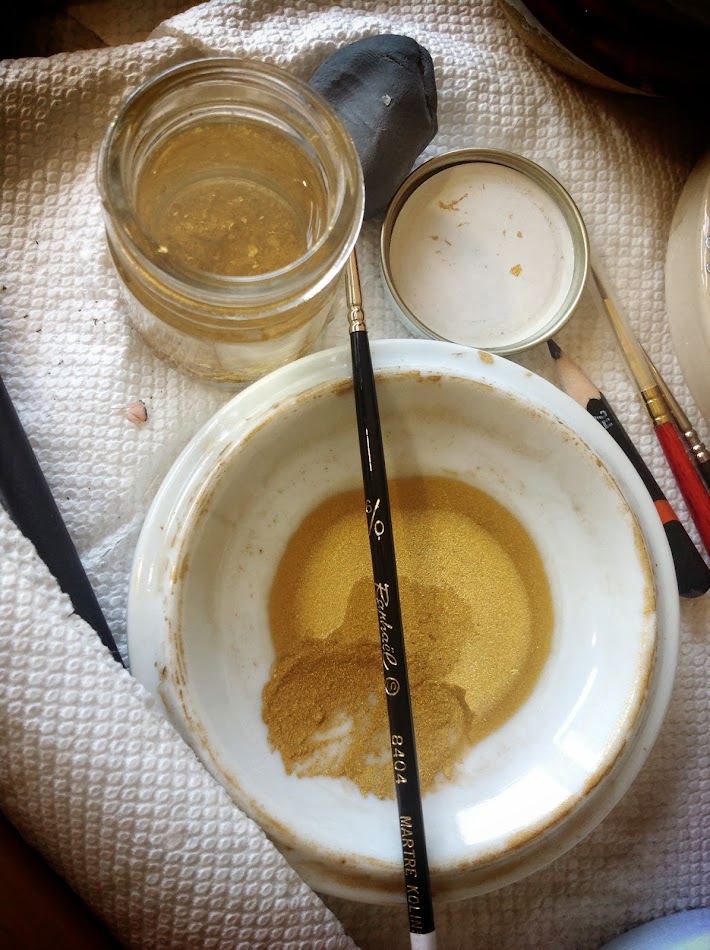
In the picture below you will notice a screw-top glass jar, this is dedicated rinse water for my brush. It allows me to trap any gold from the brush so that it can be re-prepared with my next batch of gold powder, thus not wasting any. For the same reason, when gilding I empty any random scraps into this jar.

Pan / powdered /shell gold for use with a brush or pen.


Sources:
CHOWDRY, Anita. The Alchemy of Pure Gold Pigment. 2011. Anita Chowdry. Web. September 2012. < http://anitachowdry.wordpress.com/2011/05/16/the-alchemy-of-pure-gold-pigment/ >

Author Unknown. The Technique of Shell Gold Painting. Natural Pigments. 2013. Web. July 2013. < http://www.naturalpigments.com/art-supply-education/cat/art-brush-info/post/technique-shell-gold-painting/ >

PORTER, Betsy. Making and Using Shell Gold. Art and Iconography. Web. January 2013. < http://www.betsyporter.com/shell_gold.html >

Friday, September 6, 2013

Sap Green from Buckthorn Berries (Part 1)

Given the amount of words written about sap green it's not surprising that it was a valued pigment within the illuminators pallette. Made from the berries of the buckthorn (Rhamnus), it was used not only as a "verjuice" to enhance the colour of verdigris, but also later as a colour in it's own right which the Italians apparently called verde di vescica since it was kept as a thickened liquid in "bladders".

So, what is Buckthorn?
Buckthorn found growing in my garden.
Rhamnus is a genus of about 150 species of shrubs or small trees, commonly known as buckthorns, which bear fruits of dark blue berries. They are common to North America and Asia but also appear in Europe and North Africa.

Who really knows which species the medieval recipes used, all we can really do is speculate on the ones that could have been available. Some possibilities include [1]:
  • Rhamnus alaternus - Known as Italian Buckthorn or Mediterranean Buckthorn.
  • Rhamnus cathartica - Known as Common Buckthorn or Purging Buckthorn. Native to Europe including the British Isles. This species is mentioned in Merrifield as being used by the Italians (ccxviii).
  • Rhamnus lycioides - Known as Black Hawthorn, European Buckthorn, Mediterranean Buckthorn. Native to the Mediterranean region of southern Europe.
  • Rhamnus frangula - Known as Alder Buckthorn. Native to Europe, including the British Isles. "The bark yields a yellow dye, and the unripe berries furnish a green dye."
  • Rhamnus glandulosa - Found in Portugal and Spain.
Thompson tells us in The Materials and Techniques of Medieval Painting that ". . . it is evident, from experiments which have been made in the laboratory of the Coultauld Institute, that some varieties yield inferior colours. . ." (170). My guess, they would have used whatever was available to them locally and the colour may have differed according to locality, some more so than others.

Harvesting the berries.
The berries of the buckthorn are small and globular, up to about 10mm in diameter. They seem to form in non-uniform cluster along the growing branch. 

In the footnotes of De Arte Illuminandi translated by Thompson and Hamilton we are told that ". . . the colour came out yellow if the berries were gathered in August, and green if they were gathered about the middle of September, we may probably assume that the quality of green yielded by the Rhamnus fruits was not entirely definite. It must have varied in its content of yellow, according to date and the nature of the season. . . "(43). Which sounds like it ties in with the experiments made by the Coultaud Institute mentioned by Thompson in the quote above.

Freshly collected Buckthorn berries in a metal bowl.
Since discovering Buckthorn growing in my north American garden early this spring I've been waiting patiently all summer for the berries to develop and ripen. From my reading I knew that this would likely happen around the end of August or into September, and so I've been keeping a watchful eye.

On Sept. 4th I picked 175 grams of berries ranging in colour from mostly green to very deep purple, almost black. I didn't concern myself with the ripeness while picking as I knew that I would be separating them to see what the difference in colour will be once processed. They were then separated into three rough colour groupings and deposited into glass mason jars, of which; 28g was of mostly green (unripe) berries that according to sources should produce a very yellow colour; 30g of "blush" berries (obviously purple but still showing green) that fall somewhere between unripe and ripe; and finally 117g of squishy, ripe, deep purple-black berries which should yield the sap green pigment described.

Fresh Buckthorn berries divided by ripeness and contained in clean, glass Mason jars.
As an aside, when I put water in the used metal collection container to wash it, the water turned a yellow'ish-green colour. The only thing left in the container was a clear sticky substance left from the berries.

My next step will be to follow some of the recipes found within various treatises to produced the sap green colour used by period artists.

Continued in Part 2

Footnotes
[1] The footnote on pages 32 and 33 of the Thompson translation on Ceninni's Il Libro dell' Arte mentions both R. alaternus and R. catharticus but also offers further suggestions for potential species of Rhamnus available to medieval artists.

Cited Works & Bibliography
ANONYMUS. De Arte Illuminandi: The Tecnique of Manuscript Illumination. Translated by Daniel V. Thompson and George H. Hamilton. New Haven: Yale University Press., 1933. Facsimile.

CENNINI, Cennino D' Andrea. The Craftsman's Handbook. The Italian "Il Libro dell' Arte."Translated by Daniel V. Thompson, Jr. Mineola: Dover Publications, Inc., 1933. Print. ISBN 13:978-0-486-20054-5

DOUMA, Michael, curator. Pigments through the Ages. 2008. Institute for Dynamic Educational Development. Web. 28 August 2012. < http://www.webexhibits.org/pigments >

MERRIFIELD, Mary P. Medieval and Renaissance Treatises on the Arts of Painting. Mineola: Dover Publications, Inc., 1999. Print. ISBN 0-486-40440-4

Rhamnus (genus). 2013. Wikipedia. Web. July 3, 2013 < http://en.wikipedia.org/wiki/Rhamnus_(genus) >

THEOPHILUS. On Divers Arts. The Foremost Medieval Treatise on Painting, Glassmaking and Metawork. Translated by John G. Hawthorne and Cyril Stanley Smith. Mineola: Dover Publications, Inc., 1979. Print. ISBN 0-486-23784-2

THOMPSON, Daniel V. The Materials and Techniques of Medieval Painting. Mineola: Dover Publications, Inc., 1956. Print. ISBN 0-486-20327-1

Wednesday, July 10, 2013

Not-Even-Trying-To-Be-Period Verdigris

Verdigris has been used throughout the medieval period as a green pigment. It has a fairly fine particle size and usually has a teal-like blue-green colour.

A number of recipes can be found within the medieval art treatises and they all seem to be variations of the following; suspend plates of copper over vinegar in a sealable jar for a number of days and keep the vinegar warm either by keeping it in a warm place or burying it in the dung/compost heap.

For an assignment I needed some verdigris, and I needed it quickly. Perfect timing for a quick, initial experiment before looking at this pigment more in-depth. There has been, and will be, more reading involved which no doubt will spawn another post at a later time.

Scrap copper pipe.
Day One (June 1, 2013): All I have on hand are very non-period tools and materials since this is a slightly spur-of-the-moment experiment which was born of a burst water pipe. When we opened up the wall to fix the leak I was really happy to find copper pipe, it's been sat waiting for me ever since.

My first step was to cut the pipe into more manageable pieces and discard the welded joints, for this I used a standard pipe-cutter available from any hardware store. I wasn't too concerned with the lengths being even so they range in size from about two to four inches.

Materials used.
For my "sealed pot" I used what was on hand, in this case a plastic tupperware bowl and and a zip-lock bag. To suspend the copper pipe I made holes at the top of the plastic bowl with a 1/4" diameter screw and then used wooden skewers fed through the holes and pipe. Into the bowl I poured about half an inch of Heinz Distilled White Vinegar (5% acidity).

Some translations call for the sealed pot to be buried in dung, but since I believe this is more to do with available temperature I'll be leaving my "pot" in a hot sunny location.

Day Two (June 2, 2013): Surprisingly, I already have an obvious patina of acetate forming on the copper pipe that was set up yesterday. I honestly wasn't expecting to see much of a result for at least a few days, if not weeks. That's not quite 24hrs and I already have some verdigris pigment forming.

This actually leads me to wonder just how much of a role temperature plays in this reaction? Would the acetate form just as quickly during the cold winter months?

 It looks "damp", which is most likely due to the amount of condensation visible in the ziplock bag but it definitely has the bluish-green colour typical of verdigris. I expect that when I harvest the pigment, the colour will dry a little lighter.


Copper acetate forming on the pipe.
Day Four (June 4, 2013): One drawback I'm discovering about doing this in a plastic ziplock bag is that it's creating a lot of condensation which drips onto the copper. (Is vinegar condensation, vinegar or water?). I'm pretty sure that this wouldn't happen in a sealed ceramic or metal pot, or maybe it does and that's why the period texts tell you to bury it in dung. It would certainly keep a more even temperature which I think would reduce or even eliminate the condensation.

Day Twenty Two (June 22, 2013): I got bored with watching it, not to mention I need to use it on something I'm working on.

It's a beautiful if not slightly windy day, so I set up my work area outside on the deck. To prevent the wind from blowing the pigment around I placed one of the stoneware dishes made for me by Bruni into a large plastic ziplock bag, this was to be my pigment catch-plate. I carefully opened the bag containing the vinegar and copper and proceeded to remove the first of the tubes with the help of tweezers, transferring it to the catch-plate. Wearing a fine-particle mask and latex gloves I then scratched the green pigment off the tube with a small metal palette knife, allowing it to fall onto the catch-plate. These steps were repeated for all five tubes. Once all the pigment had been scraped I transferred it into a small glass jar. This is known as "basic" verdigris.


Not-Even-Trying-To-Be-Period Verdigris being scraped from the copper piping.
Materials for the next batch.
Since I want this little experiment to continue, and to be honest I would like more verdigris since it's such a common medieval pigment, I've created a fresh container of vinegar and copper. My container this time is an old ceramic countertop compost pail I've had sitting around for the longest time, it's the closest I can get to a period "sealed container" without specifically buying something (I'll be checking out pottery wares at Pennsic). I've used the same Heinz Distilled White Vinegar (5% acidity), contained in a glass cup at the bottom of the pail which I've secured with wax to prevent slipping. I've used the same copper piping, albeit more of it which I've just randomly dumped in the pail, as opposed to hanging. I've used wax to secure the lid on the pail and to fill the vent holes, effectively sealing the container. My intent is just to leave it forgotten in the garden until the weather turns cool in the autumn.

Monday, June 3, 2013

Owyn Greenwood (Order of the Golden Rapier)

Order of the Golden Rapier
K&Q Archery Championships and Southern Region War Camp
Awarded June 1, AS 48 (XLVIII)


Monday, April 29, 2013

Recommendations for Beginner Scribal Materials

Does this sound like you...

"Mostly I don't know where to start. I like to look at all of the pretty scrolls but I don't know what basic supplies to get to start trying."

It certainly sounded like me when I first started, and even though I have an art background I had no clue how to get started or what supplies I needed. I spoke with a few people, found a few online scribal communities, joined some email lists, and asked a few questions. There was however a lot of trial and error and although I've gained confidence and skill I still remember those first tentative steps, so here are my recommendations for beginners on the types of tools and materials to equip themselves with.

Firstly, buy the tools and materials that YOUR budget will allow. Also, remember that materials (and by extension your art) end up being very personal, so what one artist loves another one dislikes. These recommendations are just MY opinion, try different tools and materials as your time and budget permit - if you love them, great. If not, then try something else until you find something you do like.

Strathmore 300 Series Bristol Board - In reality it's just thick, multi-medium paper and comes in a smooth  or textured finish. The smoother finishes are much nicer for calligraphy. It can usually be found in local arts and crafts stores, various online stores also carry it. Look for “acid-free” paper to prevent degradation over time. I have both a 9 x 12 and an 11 x 14 pad, one in the "smooth" finish and the other in the "vellum" finish. Both have successfully been used to complete scribal assignments.

Artist Paint Brushes - You'll want to build a selection of small, "round" brushes that have a point. Look for brushes that have at least one "0", preferably multiple "0000" or "3/0" - that's their size. Synthetic hair is fine, and cheaper. "Gold Scepter" is a brand that springs to mind that is readily available in the smallest sizes and perform very well.

Artists Goauche - I am a fan of the Windsor & Newton goauche ("artist" or "designer", rather than "student" grade). However there are other brands, for example I hate the W&N gold but I LOVE the Holbein brand counterpart (Pearl Gold - G641). I will say that if you're going to splurge on anything, gouache should be that thing and as a very general rule, the more expensive the tube the higher the pigment concentration. You can usually buy basic colour sets, or you can buy individual tubes of the colours you need. Try to stick to one manufacturer as much as possible so that the ingredients don’t “fight” over time. When I first started, I just bought individual tubes as I needed them and initially found the following W&N colours to be the most useful - "Ultramarine", "Brilliant Yellow", "Cadmium Red", "Permanent White" and "Jet Black"

Personally I find the "student grade" paints chalky so they end up looking pale or weird on the page. This is a personal gripe I have from my college days though, others may disagree with me.


Pens for Calligraphy - You can usually buy basic calligraphy nibs and holders in sets at the art store. Speedball brand is probably what you will find and they do the job just fine. Each set will have a variety of nib sizes to create different size letters, but make sure at least one of the nibs comes to a fine-point so that you can use it for drawing the lines for your art work.

Ink for Calligraphy - Art stores will usually carry a large selection of inks in various colours. Sometimes, you'll get lucky and find "Iron Gall Ink" or "Oak Gall Ink". If your store carries either of these then buy it and take pride in the fact that you have your first (depending on the recipe and production) period artist material. Iron Gall Ink is my default and I very rarely use anything else because I love the way it flows from my nibs.

Now, I haven't personally seen Iron / Oak Gall Ink sold in any of the stores I've been in (I buy it online), therefore my other beginner recommendation for dip-pens is Sumi black ink. It comes in a bright green, heavy plastic bottle with a black cap and the ink itself has a nice viscosity to it. A word of warning though, it is very corrosive on your nibs if you don't clean them properly. It's very black, and works really well for line-work. You can also find this ink in red (red bottle, black cap).

Pencil - Used for sketching out your artwork and drawing your calligraphy guidelines. When you're at the art store you'll notice that they are graded, "B's" with a higher number being the softest through "HB" which is the middle and then into "H's" which are considered hard. You're looking for a grade that won't damage the surface you'll be working on and that can be erased easily.

Personally I opt for a 2H as it works FOR ME, but choose a grade that will work for the type of pressure you're likely to apply while using it. To hard and it will damage your surface, to soft and you'll have a tougher time while erasing.

Rubber / Eraser - Many scribes swear by those blocky, hard rubbers you probably used in school, just make sure that it's white to avoid potentially marking the page. These can be purchased in a variety of places.

I personally find those hard white rubbers a little weird to use and dislike them. I tend to use what is known as a "putty rubber" or "kneadable eraser" as it works better for me. These are usually found near the pencil selection in the art store.

Straight Edge - You'll need some sort of ruler to mark out your page and draw the lines you'll need for calligraphy. Rulers can be purchased in a variety of materials, lengths and styles. Personally I recommend that you buy one made out of metal as plastic and wooden rulers have the potential of being sliced by your craft knife, thus ruining the straight edge. If you can find one that has a cork backing even better, as this raises the edge off the page a little and helps avoid bleeding or smudging.

Paint Palette - Cheap, multi-well plastic palettes can be found at arts and crafts stores. However, you could also use a dinner plate, ceramic tiles, muscle (or other crustacean) shells, a glass ashtray or any other number of household items you probably already own.


Other Random Supplies - Although you don't NEED any of the following supplies they're useful to have around.
  • Distilled Water - I tend to use this rather than regular tap water to avoid the various additives combined at the treatment plants. One argument is that because it's "purer" it's closer to period water, but who knows if this is true or even really matters.
  • Eye-dropper / Pipette - Found at pharmacies, they end up being very useful for adding very small amounts of water to your paints to thin them.
  • Scalpel / Craft Knife - If you're buying the pads of Bristol paper you probably won't need a craft knife as they're already sized appropriately. However they useful to have around.
  • Cotton Ear-Buds - Yes, the things you clean your ears with. They're actually very useful dipped in rubbing alcohol to clean your calligraphy nibs.
  • Rubbing Alcohol - As mentioned above, rubbing alcohol is great for cleaning your calligraphy nibs.
  • Magnifier - Helps you not strain your eyes! 
  • 100% Talc - Wash your hands, dry them and then coat them in talc. It's stop your hands from sweating while you work.
  • Scrap Paper - Rest your hand on some scrap paper while you work as it will protect the page you're working on from getting greasy and picking up smudges. Hands are dirty!
Useful Links - There are numerous online resources for the things I have mentioned in this post, below are a few of the websites I find useful. Remember to check your local arts and crafts stores as many of these items can be found there.